pie beta kappa

this blog is for the servantless but professional overachiever who is concerned with assignments, deadlines, and changing the world, and still wants to find the time to enjoy producing something wonderful to eat.

Month: June, 2012

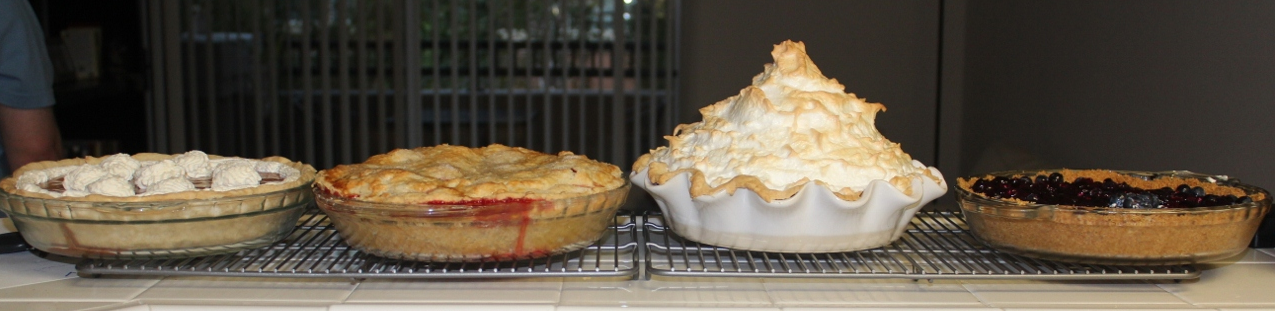
pie 2: live free or pie hard

SEQUEL TIME.  Because this is the sequel to the seminal pie post, it needed a funny, punny movie sequel play on words.  “Life Free or Pie Hard” was the winner for its true ridiculousness.  “Pie Another Day” was a close second.  Runner-ups included “Pie-r Pie-r”, “Pie Story 2”, “Harry Potter and the Half-Baked Pie”, and “P2: The Pie-ty Ducks.”  Any better suggestions are, of course, absolutely welcome.

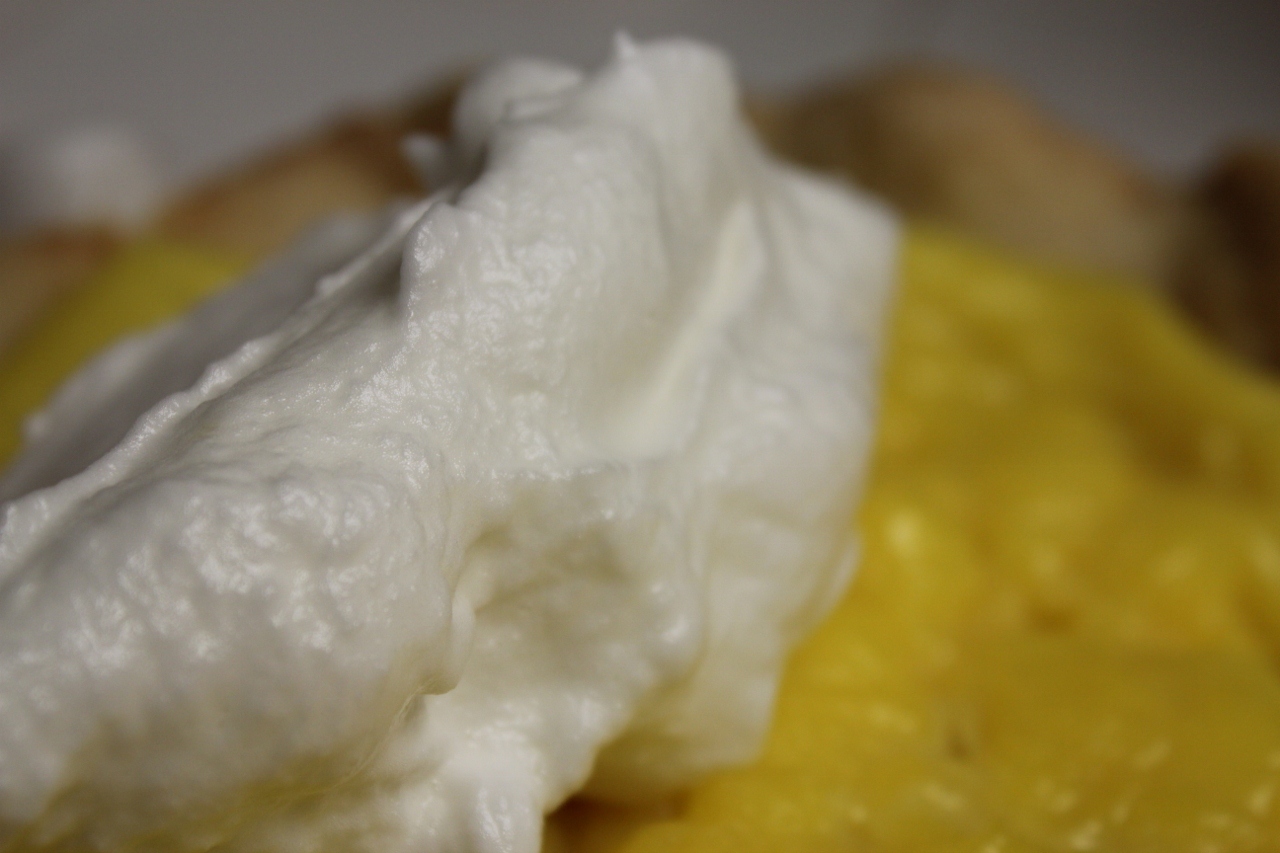
And some credit where credit is due: almost all of the photos on this blog are taken by a very patient M. who deals with questions like “What’s the best lighting for rhubarb?” like a pro.  (And the answer to that question: there is none.)

GRANDMOTHER’S HERSHEY BAR PIE, from the kitchen of my grandmother

Ingredients
1/2 cup milk (whole is best)
24 large marshmallows
6 1/2 ounce Hershey with Almond bars, shaved
1 pint whipping cream
1 9″ baked pie shell
1 extra Hershey with Almonds bar for garnish

Directions
Heat milk over a double boiler or in a glass bowl over simmering water.  Do not boil.  Add marshmallows and stir until thoroughly melted.  Add shaved chocolate bars and stir until thoroughly melted.

Cool thoroughly.

Whip 1/2 pint whipping cream and fold into the cooled chocolate mixture.

Pour into pie shell and refrigerate at least two hours.

Whip remaining cream and spread over the filling or pipe through a pastry bag with a rose tip.  Top with chocolate curls from the extra Hershey bar, if it’s managed to survive.

Notes

This is a very sweet pie, so you need to be in the mood for marshmallows and chocolate.  (I know, I know.  That sounds ludicrous.  Who isn’t in the mood for marshmallows and chocolate?  But it suffered when eaten in contrast to fruit-laden pies.)

If shaving the chocolate is too time-consuming or if you come dangerously close to shaving your finger instead of the chocolate (*ahem*), an alternative is to cut the chocolate in very slender strips with a good chef’s knife or santoku knife.  It melts just the same, but might not be as pretty for garnish.

And speaking of the garnish… a word to the wise.  It is very, very dangerous, when mixing marshmallows and chocolate, to leave the chocolate pieces that you are saving for the top on the kitchen counter.  Not only can they disappear into the mouths of bystanders (piestanders?) before you can say “stop!”, but they are also awfully, awfully tempting to the piemaker.  I would recommend buying a little extra and setting the extra in plain view while hiding the rest.

STRAWBERRY-RHUBARB PIE, straight from Cook’s Illustrated

Ingredients
1 pie dough (for both top and bottom)
2 teaspoons vegetable oil
1.5 pounds rhubarb, ends trimmed, cut into 3/4-inch pieces (peel if tough)
1 cup and 1 tablespoon sugar
1 pound strawberries, hulled and quartered
3 tablespoons arrowroot powder
1/2 teaspoon vanilla
2 teaspoons orange zest
1 egg white, beaten
pinch of salt

Directions
Confession time.  This is the first recipe that wasn’t altered at all.  We followed it to the letter except for one thing that was a decision based on necessity rather than artistry (ran out of arrowroot, substituted one tablespoon of corn starch for one tablespoon of the three tablespoons of arrowroot).  And because of that, I am going to recommend going to the source for the recipe.  If you’re not a member of CooksIllustrated.com, you can join for free for 14 days to get the recipe (and believe me, this recipe was worth it).

Notes

Absolutely amazing recipe.  Cooks Illustrated, and Nick, the co-pie-lot in the kitchen for pie day (oh, come on, there had to be one more pie pun before this was over), hit this out of the park.

this american pie

PIE IS supposed to be the quintessential American dish.  “As American as apple pie” is perhaps one of the earliest similes learned by schoolchildren.  But the truth of the matter is that the history of pie is neither an American one or a sweet one.  While pies, and sweet pies in particular, have gained a rather devoted following in the last few centuries, Laura Mayer in TIME briefly explored the history of pie just in time for Thanksgiving 2008 and noted that the vast majority of pie’s existence has been spent as a savory meat pie.  In fact, Mayer credits the Greeks with inventing pastry (insofar as a butterless flour-water combination can be called “pastry”) and, therefore, inventing pie.  Personally, I think we humans are secretive creatures who like to get our hands dirty, so the inclination to (1) squish gooey dough in our hands and then (2) hide something inside of it is contained deep within our souls.

So what does one put inside of one’s dough?  Almost anything.  Pie can act as a kind of preserving apparatus, in a way.  Meat, fruit, vegetables… anyone who has eaten shepherd’s pie has probably thought, “where do they come up with this stuff?” right before asking for seconds.  But, on a more personal level, what do you choose for the first pie you ever make?

Probably not a huge soul-searching dilemma.  Unless you have a food blog.  Whose name has pie in it.  And you’ve managed to spend a not-insignificant portion of adult life puttering around the kitchen and studiously avoiding pie.  Then, there’s a little bit of soul-searching.  Vacillating.  Pontificating.  Ruminating.  Procrastinating.  Until finally, finally, you have it.

And so you call up a few friends, and make four pies instead.

This is the first of two pie installments servings.  Each has a simple and simply delicious pie passed down from my mother’s mother, and a pie from Those Who Get Paid to Make Pie Well.

The very first pie to find itself chilling in the refrigerator (you heard me, I started with a no-bake pie) was my grandmother’s fresh berry pie.  Now, when my grandmother made it, it was always boysenberries, fresh from the small garden in their backyard.  My grandfather loved boysenberries.  This could be any berry you want, but in the spirit of making pies to delight the heart of one’s beloved, I made a blueberry pie.

GRANDMOTHER’S FRESH BERRY PIE, from my grandmother’s kitchen
makes one 9″ pie

Ingredients
Graham Cracker Crust
1 1/4 cups graham cracker crumbs
1/4 cup sugar
5 tablespoons unsalted butter (melted)
1/8 teaspoon salt

Filling
4 cups fresh berries, divided
1 cup sugar
3 tablespoons cornstarch
3/4 cup water
1 teaspoon lemon juice
Directions
Mix the graham cracker crumbs, 1/4 cup sugar, unsalted butter, and salt.
Using the back of a wooden spoon and/or the bottom of a small glass, press the crumb mixture firmly on the bottom and up the sides of the pie plate.
Line the graham cracker crust with three cups of the berries.
Simmer the remaining berries with water for 3-4 minutes.  Add sugar and cornstarch, stir and cook until clear.  Add lemon juice to the mixture and stir.

Cool, then pour over berries and refrigerate.  Serve with real whipped cream.
watch out for wayward dollops of cream when baking four pies at once
Notes
If you’re using a berry that doesn’t automatically fail the “I dropped it on my white shirt” test, like a blueberry, the pie could use more of the simmered blueberry mixture on top of the blueberries.  It might also help with some cohesion issues I found myself having.  (I blame the blueberries.)
 
MILE HIGH LEMON MERINGUE PIE, adapted from Martha Stewart
Ingredients
All purpose flour, for dusting
Pie pastry dough, blind baked (I used the one in this post, instead of Martha’s pate brisee base, mostly because the French intimidated me and I was already sufficiently intimidated by the meringue.  And because I liked the dough I’d made)
Lemon Filling
1 large egg
2 tablespoons heavy cream
1/3 cup cornstarch
1/3 cup sifted cake flour
1/4 teaspoon salt
1 1/4 cups sugar
5 large egg yolks, lightly beaten
1/2 cup fresh lemon juice
2 tablespoons lemon rind
4 tablespoons unsalted butter, cut into small pieces
Meringue
7 large egg whites
3/4 cup sugar
1/4 teaspoon salt
Directions
Bake the pastry shell according to directions and allow to cool.
For the lemon filling, combine cornstarch, cake flour, salt, and sugar in a medium saucepan over medium heat.  Martha notes that this should be a nonreactive saucepan.  I only had one kind, and it turns out it was nonreactive.  Copper saucepans are, apparently, reactive.  Don’t use copper saucepans in this recipe.
 
Gradually add two cups of cold water and bring the mixture to a boil, whisking constantly.  This should take about four minutes.
Remove the nonreactive saucepan from the heat.  Pour a small amount of the hot mixture into the egg yolks to temper them and keep the lemon filling from becoming lemon-and-scrambled-egg filling, then add the eggs to the nonreactive saucepan.  Cook over low heat for five minutes.
Remove the pan from the heat again and whisk in the lemon juice and rind.  Add the butter one piece at a time, but in a fairly methodical manner while the mixture is warm enough to melt the butter.
 
When the butter is fully melted and absorbed into the mixture, pour it into a large bowl and let it cool.  Place wax paper directly on top of the  surface to prevent a skin from forming.
When cool, pour the filling into the pastry shell, cover with aluminum foil, and refrigerate for approximately one hour, until firm.
When the lemon filling is firm, make the meringue by combining the egg whites, sugar, and salt in a heat-proof bowl.  Set over a pan of simmering water and beat until warm and the sugar and salt are dissolved into the egg whites.
 
Remove bowl from heat and whip into stiff peaks.  This alone makes pre-stand mixer cooks who could make any kind of lemon meringue pie, much less a beautiful one, head and shoulders above all the rest of humanity.
 
Spread the meringue over the pie  so that it touches the crust all around.  This will, at least in theory, reduce the “weeping” that occurs (in which watery puddles form at the bottom of the pie pan after pieces are removed).  Using the flat part of a spatula, lightly tap all over the surface of the meringue to encourage well-intentioned, “it came out this way all on its own” peaks.
Broil until brown, approximately two minutes.  Watch as closely as you would a two-year-old in a china shop.
Serve at room temperature.
Notes
Because I was so intimidated by its height and its gravity (or lack thereof), I was very careful to adhere to Martha’s meringue work.  With that said, it didn’t quite taste right.  The lemon filling was delicious, and the crust was of course delightful, but the meringue was, as Nick put it, savory.  Not the expected sweet.  Don’t get me wrong, it didn’t keep me from finishing my slice.  Very quickly.

baby don’t you cry, gonna make a pie

TODAY WAS PIE DAY.  All day.  Seven hours and four pies later, I have to admit that the post this week will be late.  But the eponymous post is coming, I promise, and not just one but two posts to cover all four pies.

Until then, I leave you with lyrics from the movie “Waitress“:

baby don’t you cry
gonna make a pie,
gonna make a pie 
with a heart in the middle…

outrageous oatmeal cookies

EVERY COOK has go-to recipes for certain occasions.  Those tried-and-true recipes that are guaranteed, barring a gas leak, a broken stove, or an act of God, to impress.  The only downside for these recipes, of course, is that there are never any leftovers.

I’ve always tried to keep my go-tos to a minimum for fear of seeming a one-trick (or two-trick, or three-trick) pony.  In college, it was lime and garlic chicken fajitas — the simple, cheap meal that, in California at least, everybody eats.  These days, I have two go-to meals.  One for special occasions (maybe I’ll share it some time), and one for friend or work barbecues.

Outrageous oatmeal cookies are what I make when I’m going to a barbecue.  They’re perfect on so many levels.  First, they’re delicious.  Second, they’re unassuming.  Their appearance, and their very nature as a dessert, means that they won’t be upstaging the host’s dishes.  (At least, until they’re the first dish gone.  But then they’re gone.  At that point, you can’t be blamed for a nonexistent dish.)  And finally, they’re not a guilty cookie. Whole wheat flour, no butter (!)… sure, cookies are never foods on which you should subsist.  But if they’re delicious first, and not terribly bad for you second, it’s a bonus.  (Depending on your crowd, you lead with delicious or lead with “no butter, but delicious!”)

OUTRAGEOUS OATMEAL COOKIES, adapted slightly from my mother’s recipe drawer

Ingredients:
1 1/2 cups vegetable oil
2 eggs
2 cups whole wheat flour
2 teaspoons baking powder
1 teaspoon salt
2 cups packed brown sugar (light or dark)
6 cups old-fashioned oats (or part granola)
2 cups broken walnuts
6 ounces semi-sweet chocolate morsels
1/2 cup warm water

Directions:
Preheat oven to 375 degrees Fahrenheit with the rack in the center position or with both racks evenly distributed around the center of the oven.

Combine oil and egg, whisking briefly to combine.  Mix flour, baking powder, and salt in a very large mixing bowl, and stir until blended.

Add brown sugar, oats, walnuts, and chocolate, then stir to combine.  Add oil and egg mixture and work through the dough with a wooden spoon (or your fingers) until moistened throughout.  Add just enough warm water to make the mixture damp enough to hold together.

Generously grease two heavy baking sheets.  Using a 1/4 or 1/3 measuring cup (depending on desired size of cookies) to form the mixture into mounts and place on baking sheet with 1-3 inches between them.

Bake for 10-15 minutes until the cookie feels done when pressed with a finger.  Cool briefly, then use a spatula to remove from baking sheet.  Cool completely.

Notes:

The “very large mixing bowl” is no joke.  I don’t have a bowl big enough.  I use my fingers to mix the ingredients because using a spoon knocks too many of the ingredients out of the bowl and, invariably, onto the floor.  And, let’s face it, I use my fingers to mix because it’s also fun.

salmon cakes, and a tale of two lemon sauces

COMING OFF AN UNDER-THE-WEATHER kind of weekend, I wanted a meal that would be comforting, summery, and still fairly healthy.  Early on Sunday I began craving some sort of fish.  I stumbled across a recipe for Poached Salmon with Avocado Sauce, but it was in this month’s Bon Appetit and I’m trying to vary my sources.  (Alas, poached salmon will have to wait for another day.)

But the idea of salmon stuck with me, so I did some more digging and I came up with a four-year-old recipe from Gourmet for salmon cakes with lemon yogurt.  Like crab cakes, but with salmon.  So far, so good.

I did some tweaking to the recipe (changing pita bread to panko crumbs for artistic/culinary purposes, ground coriander to cumin for what’s-in-my-pantry purposes), but the yogurt-based lemon sauce was leaving me skeptical.  It sounded a little bland, and reading reviews of other cooks on epicurious it sounded like the sentiment was shared.  Others, however, raved about the sauce, and so my Sunday night became a tale of two lemon sauces: one by Gourmet, and one adapting Gourmet’s sauce to have a little more bite with dill and Greek yogurt in place of plain yogurt and chives.

The sauces and the salmon cakes were quick and easy to make (much faster than last week’s tart!).  I had no trouble keeping the salmon cakes together while they were cooking.  They smelled delicious, and tasted even better.

After taste testing each sauce, the choice was unanimous.  Both were good, don’t get me wrong.  But the extra oomph of the Greek yogurt and the dill made the adaptation the clear winner.  I may have gone so far as to dunk my bread in the Greek yogurt sauce.  Repeatedly.  Until the bread was gone.

SALMON CAKES WITH LEMON YOGURT, adapted from Gourmet, April 2008

Ingredients:
For salmon cakes:

1 pound salmon fillet, cut into 1/2-inch cubes
3/4 cup panko breadcrumbs
1/4 cup mayonnaise (see below for recipe or use storebought)
1 large egg, lightly beaten
1/2 teaspoon cumin
1/4 teaspoon cayenne pepper
1 tablespoon chopped chives
1  teaspoon grated lemon zest
2 tablespoons olive oil
1/2 teaspoon salt

For sauce #1:
3/4 cup plain whole milk yogurt
1/4 teaspoon salt
1 tablespoon chopped chives
1 teaspoon fresh lemon juice
1/2 teaspoon lemon zest

For sauce #2:
3/4 cup Greek yogurt
1/4 teaspoon salt
1 tablespoon chopped dill
1 teaspoon fresh lemon juice
1/2 teaspoon lemon zest

Directions:
Mix together the salmon, breadcrumbs, mayonnaise, egg, cumin, cayenne, 1 tablespoon of the chives, 1 teaspoon lemon zest, and 1/2 teaspoon salt.  Season with freshly ground black pepper.

Form salmon mixture into 4 cakes, approximately 4 inches in diameter each.  Stack with wax paper between each cake and chill for a few minutes in the refrigerator.  (Just enough to help them stick together — this is a perfect time to do a little cleanup or a few dishes.  Or to make the sauce(s), if you haven’t already.)

Heat olive oil in a 12-inch heavy nonstick skillet over medium high heat until it shimmers.  Cook the salmon cakes until golden and just cooked through, turning once.  This should take approximately 6-7 minutes in all.

Place cakes on a paper towel to soak any remaining olive oil sticking to the bottom of the cakes, then plate.

Yogurt sauce #1: Stir together yogurt, lemon juice, 1/4 teaspoon salt, the remaining tablespoon chives, and 1/2 teaspoon lemon zest.

Yogurt sauce #2: Stir together Greek yogurt, lemon juice, 1/4 teaspoon salt, 1 tablespoon dill, and 1/2 teaspoon lemon zest.

Serve salmon cakes with sauce.

HOMEMADE MAYONNAISE, from Bon Appetit, April 2008

Ingredients:
1 large egg yolk
1 1/2 teaspoons fresh lemon juice
1 teaspoon white wine vinegar
1/4 teaspoon Dijon mustard
1/2 teaspoon salt
3/4 cup canola oil

Directions:
Combine yolk, lemon juice, vinegar, mustard, and salt in a medium bowl, and whisk until bright yellow.

Use a 1/4 teaspoon measuring spoon, add 1/4 cup of the canola oil, one spoonful at a time while whisking constantly.  This should take approximately four minutes, depending on how full your 1/4 teaspoons are.  (Mine, apparently, were somewhat lacking.)

Add the remaining 1/2 cup canola oil in a small, slow, steady stream while continuing to whisk constantly.  Continue whisking until the mixture is thick and lightened in color, approximately eight minutes.  Cover and chill.

The mayonnaise can be made up to 2 days ahead of time, but keep chilled.

Notes:
I served the salmon cakes with brussels sprouts, a crunchy warm baguette, a cold rosé, and fresh strawberries for dessert.  (Strawberries have an irresistible siren song when they are sitting in a display at a grocery store.  Or at a farmer’s market.  Or drooping, perfectly red and ripe on the vine.  Anywhere, really.)