pie beta kappa

this blog is for the servantless but professional overachiever who is concerned with assignments, deadlines, and changing the world, and still wants to find the time to enjoy producing something wonderful to eat.

Category: main course

roast pumpkin with cheese fondue

OCTOBER IS FOR PUMPKINS. The beautiful, symmetrical, bright orange squash evokes images of red orange brown maple leaves swirling along dirt paths, big puffed-up tom turkeys strutting outside a fenced-in garden, and kitchen tables spread with newspaper for pumpkin-carving.

Would we enjoy our pumpkins so much if we had them for more than a month or two? Or does their scarcity a luxury make?

The longer you think about the question, the less time you have to make delicious recipes with pumpkins while they are here.

Roast Pumpkin with Cheese Fondue, from Gourmet

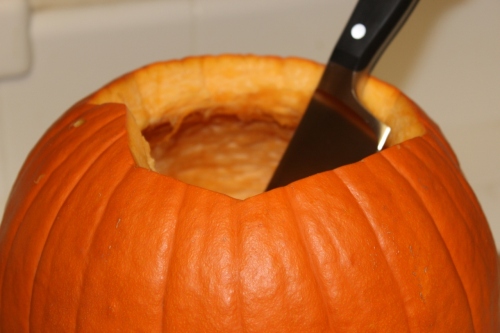
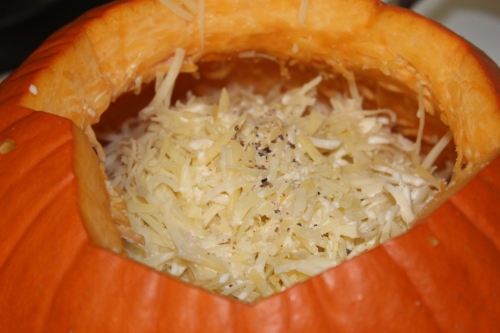
Because I follow the simple, delicious recipe to the letter without adapting it, I am linking to its original online iteration. The basic premise of the “fondue” is that you hollow out a pumpkin which acts both as baking container and vegetable concoction. Once the pumpkin is emptied of its stringy contents and the seeds cleaned, seasoned, and popped into the oven to bake for their own fun snack, you layer toasted baguette slices, shredded Gruyere and Emmental cheese, and a cream/nutmeg/salt/pepper/broth concoction inside of the pumpkin until it is full.

Then, you place the top of the pumpkin back on, brush the outside of the pumpkin with oil, and bake it until the pumpkin flesh is soft and the bread and cheese inside is puffy and delightfully gooey.

Go sit upon the lofty hill,
and turn your eyes around,
where waving woods and waters wild
do hymn an autumn sound…
“The Autumn,” Elizabeth Barrett Browning

farmer’s market pasta

JULY IS HERE, and all I want are delicious foods made from fresh fruits and vegetables.  And maybe a few grilled things smelling of smoky goodness.  And ice cream.  Homemade ice cream.  But, I digress.

I spent a year in Washington, DC, not so very long ago.  While I was there, I created some very strong food memories.  It was in DC that I had my first (amazing) Ethiopian food.  It was where I learned how to make a good red wine reduction.  It was where I ate chili cheese fries at Ben’s Chili Bowl while listening to “Man in the Mirror” right after Michael Jackson died.  And yet, the strongest food memory I took away from me in DC was its produce.

As a California girl, I expect supermarkets to be brimming with beautiful, firm, fresh fruits and vegetables.  In DC, particularly in the summertime, I would enter a Safeway to find limp green onions and sad-looking lettuce.  The one refuge from the effects of a humid city far from places that grow tropical things was Whole Foods.  I was the ghost that wandered the aisles, a girl on a budget who just wanted to be in the shiny, well-lit place with piles of perfect red, yellow, orange and green peppers that could have been a Crayola advertisement.  On a very rare day I would let myself shop for ingredients for one dish, a rare splurge.

So what does that have to do with anything?  It has to do with farmer’s market pasta.  It’s a dish that really blooms with fresh ingredients (hence, the title).  But, at the same time, the combinations of flavors (including the pesto and the bacon) means that it can rejuvenate some vegetables that might not have made it past the Whole Foods audition.  And so I exhort: if you can, get the freshest vegetables for this dish.  But if you can’t, it will still be pretty darn good.

FARMER’S MARKET PASTA, adapted from Zucchini, Corn, and Basil Fusilli in Gourmet, July 2008

Ingredients
1 pound fusilli
8 slices bacon
4 ears corn, kernels cut from the cob
1 1/2 pounds zucchini, coarsely chopped
10 ounces (1 package) grape tomatoes, halved or quartered
5-7 ounces pesto
freshly-grated Parmigiano-Reggiano
freshly-grated black pepper

Directions
Cook bacon until crispy.  When cooled, chop into small pieces and set aside.

Cook fusilli in a  pot of boiling salted water until al dente.  Reserve enough water to cover the bottom of your pot with 1/2″ of hot water.  Drain and rinse pasta with cold water to stop cooking.

Add zucchini and corn to pot and pour reserved hot water on top.  Cook on medium-high heat, stirring, for 2 minutes.  Drain.

Combine zucchini, corn, and pasta in large bowl.  Add pesto and mix until combined.  Add grape tomatoes and mix.

Dish up pasta, garnish with bacon, fresh pepper, and fresh Parmigiano-Reggiano cheese.  Serve warm, at room temperature, or cold.

Notes

Use a very sharp knife when slicing the grape tomatoes, and halve or quarter depending on size.  The grape tomatoes add a nice zing that cherry tomatoes, in my opinion, do not.  Though, in full disclosure, I must admit that I’ve never been a huge fan of cherry tomatoes.  When my brother and I were young, we were given the chore of harvesting from our mother’s horrifyingly-plentiful cherry tomato plants.  We picked the tomatoes, and promptly had a cherry tomato war whose memory has outlived our mother’s wrath.

A thought on pesto: the easy thing to do is buy a container of pesto to mix into the pasta.  It’s a perfect easy-fix on a weekday night, and this dish is bound to create leftovers (though not for lack of trying).  Because it seemed like an adventure, and because Things Created For A Food Blog Should Be Homemade, I made my own with this recipe.  It wasn’t particularly flavorful, and seemed like it needed a lot more garlic.  Maybe next time I’ll try Ina’s buy-all-the-garlic-in-Gilroy pesto.

Health-conscious?  Use bacon anyway.  (Just a little!  It’s not like you’re using the drippings, too.)  Okay, okay.  If you’re set on not incorporating bacon, you can substitute prosciutto, or probably a number of meat alternatives, or forego the meat altogether.  That’s the beauty of this recipe.  It likes a lot of different ingredients.  But it loves bacon most.

And finally… I never knew that zucchini has an ugly side, but it does: zucchini come from the  Cucurbitacea family (say that three times fast), along with cucumbers, squash, pumpkins, melons, and gourds.  While this sounds like a downright pleasant (and delicious) family reunion, all of these family members produce chemicals known as cucurbitacins that can cause bitterness.  Most of the time, they exist in such low levels that we don’t taste them at all; however, on a rare occasion, they can ruin your dinner.  So how do you protect your favorite pasta dish?  Well, there’s an old wives’ way and the PBK way.  An old wives’ tale (or an old internet tale, though the two seem to be becoming awfully similar as time goes on) is that the smaller, not as deeply green zucchinis are less likely to be the rare bitter old codgers, but I have yet to find a scientific reason backing this up.  So I suggest the PBK method: for every zucchini you chop up, eat one piece of it just to be sure it’s a good one.  Maybe two pieces, if the chopping is slow.

salmon cakes, and a tale of two lemon sauces

COMING OFF AN UNDER-THE-WEATHER kind of weekend, I wanted a meal that would be comforting, summery, and still fairly healthy.  Early on Sunday I began craving some sort of fish.  I stumbled across a recipe for Poached Salmon with Avocado Sauce, but it was in this month’s Bon Appetit and I’m trying to vary my sources.  (Alas, poached salmon will have to wait for another day.)

But the idea of salmon stuck with me, so I did some more digging and I came up with a four-year-old recipe from Gourmet for salmon cakes with lemon yogurt.  Like crab cakes, but with salmon.  So far, so good.

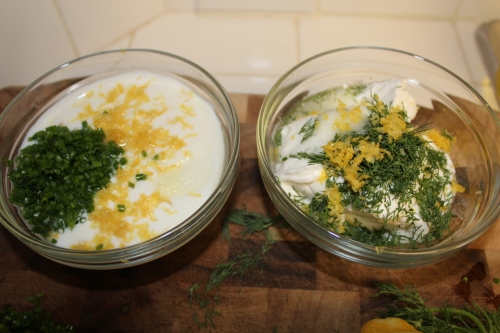
I did some tweaking to the recipe (changing pita bread to panko crumbs for artistic/culinary purposes, ground coriander to cumin for what’s-in-my-pantry purposes), but the yogurt-based lemon sauce was leaving me skeptical.  It sounded a little bland, and reading reviews of other cooks on epicurious it sounded like the sentiment was shared.  Others, however, raved about the sauce, and so my Sunday night became a tale of two lemon sauces: one by Gourmet, and one adapting Gourmet’s sauce to have a little more bite with dill and Greek yogurt in place of plain yogurt and chives.

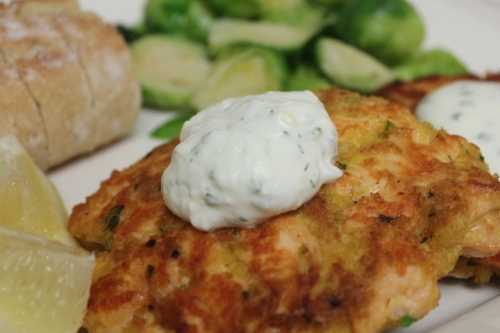
The sauces and the salmon cakes were quick and easy to make (much faster than last week’s tart!).  I had no trouble keeping the salmon cakes together while they were cooking.  They smelled delicious, and tasted even better.

After taste testing each sauce, the choice was unanimous.  Both were good, don’t get me wrong.  But the extra oomph of the Greek yogurt and the dill made the adaptation the clear winner.  I may have gone so far as to dunk my bread in the Greek yogurt sauce.  Repeatedly.  Until the bread was gone.

SALMON CAKES WITH LEMON YOGURT, adapted from Gourmet, April 2008

Ingredients:
For salmon cakes:

1 pound salmon fillet, cut into 1/2-inch cubes
3/4 cup panko breadcrumbs
1/4 cup mayonnaise (see below for recipe or use storebought)
1 large egg, lightly beaten
1/2 teaspoon cumin
1/4 teaspoon cayenne pepper
1 tablespoon chopped chives
1  teaspoon grated lemon zest
2 tablespoons olive oil
1/2 teaspoon salt

For sauce #1:
3/4 cup plain whole milk yogurt
1/4 teaspoon salt
1 tablespoon chopped chives
1 teaspoon fresh lemon juice
1/2 teaspoon lemon zest

For sauce #2:
3/4 cup Greek yogurt
1/4 teaspoon salt
1 tablespoon chopped dill
1 teaspoon fresh lemon juice
1/2 teaspoon lemon zest

Directions:
Mix together the salmon, breadcrumbs, mayonnaise, egg, cumin, cayenne, 1 tablespoon of the chives, 1 teaspoon lemon zest, and 1/2 teaspoon salt.  Season with freshly ground black pepper.

Form salmon mixture into 4 cakes, approximately 4 inches in diameter each.  Stack with wax paper between each cake and chill for a few minutes in the refrigerator.  (Just enough to help them stick together — this is a perfect time to do a little cleanup or a few dishes.  Or to make the sauce(s), if you haven’t already.)

Heat olive oil in a 12-inch heavy nonstick skillet over medium high heat until it shimmers.  Cook the salmon cakes until golden and just cooked through, turning once.  This should take approximately 6-7 minutes in all.
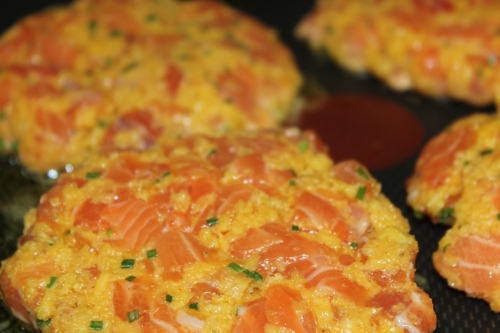
Place cakes on a paper towel to soak any remaining olive oil sticking to the bottom of the cakes, then plate.

Yogurt sauce #1: Stir together yogurt, lemon juice, 1/4 teaspoon salt, the remaining tablespoon chives, and 1/2 teaspoon lemon zest.

Yogurt sauce #2: Stir together Greek yogurt, lemon juice, 1/4 teaspoon salt, 1 tablespoon dill, and 1/2 teaspoon lemon zest.
Serve salmon cakes with sauce.

HOMEMADE MAYONNAISE, from Bon Appetit, April 2008

Ingredients:
1 large egg yolk
1 1/2 teaspoons fresh lemon juice
1 teaspoon white wine vinegar
1/4 teaspoon Dijon mustard
1/2 teaspoon salt
3/4 cup canola oil

Directions:
Combine yolk, lemon juice, vinegar, mustard, and salt in a medium bowl, and whisk until bright yellow.

Use a 1/4 teaspoon measuring spoon, add 1/4 cup of the canola oil, one spoonful at a time while whisking constantly.  This should take approximately four minutes, depending on how full your 1/4 teaspoons are.  (Mine, apparently, were somewhat lacking.)

Add the remaining 1/2 cup canola oil in a small, slow, steady stream while continuing to whisk constantly.  Continue whisking until the mixture is thick and lightened in color, approximately eight minutes.  Cover and chill.

The mayonnaise can be made up to 2 days ahead of time, but keep chilled.

Notes:
I served the salmon cakes with brussels sprouts, a crunchy warm baguette, a cold rosé, and fresh strawberries for dessert.  (Strawberries have an irresistible siren song when they are sitting in a display at a grocery store.  Or at a farmer’s market.  Or drooping, perfectly red and ripe on the vine.  Anywhere, really.)

buttermilk roast chicken; or, how i learned to stop worrying and love roast chicken

AMONG THE VARIOUS MEATS, chicken is generally glorified by the health-conscious and the not-vegetarian vegetarians whose food proclivities are accompanied by subtitles (e.g., “I’m a vegetarian, but I eat fish and chicken”).  Because of this, I am convinced that chicken, particularly white meat chicken breasts, have become the meat equivalent of brussels sprouts: foods perceived as bland but good for you.  In short, boring food.

(Two side notes:  (1) I know now that brussels sprouts can be amazing if you cook them right (more on that late-in-life discovery, another time, another place).  (2) My blasé perception of chicken breasts was further encouraged by a dieting college friend whose weekday dinners consisted of a grilled chicken breast, a steamed vegetable, and brown rice.  Every.  Night.  This may work for people who eat to live.  But for those who live to eat, it is a stifling approach to dinner.)

Of course chicken breasts can be similarly delicious if you do enough stuff to them so that they are no longer really chicken breasts: you can marinate them and cut them up with peppers for fajitas, you can bake them and slice them and insert them into pasta, and of course if you throw healthy thinking out the window you can fry them.  But I was on a mission to make a good weekday meal centered on chicken breasts that doesn’t involve frying or heavy cream-based sauces or surrounding pieces of the chicken breasts with things to make it taste better.  And that’s where Deb at smitten kitchen changed my chicken breast outlook with buttermilk roast chicken.


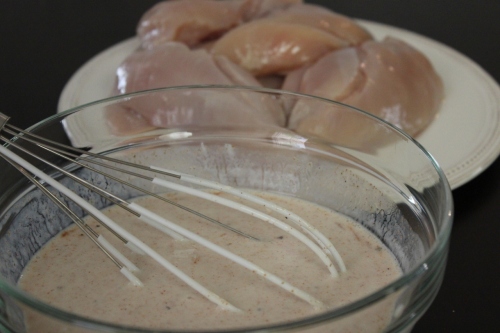
She used chicken parts generally and chicken legs, specifically.  The first time I tried the recipe, I used thighs.  The second time, I thought I’d see if the magic could be worked on chicken breasts.  Wonder of all wonders, it does.  It’s a simple marinade that encourages the tenderness and the moistness of the chicken.  And, yes, it says buttermilk, but that’s the marinade.  There’s no sauce that is being poured on the chicken, it’s just a happy bath of spices and buttermilk before the chicken is roasted.  Think of it as a trip to the spa for your chicken.

BUTTERMILK ROAST CHICKEN, adapted slightly from smitten kitchen

Ingredients:
2 cups buttermilk
5 cloves garlic, minced
1 tablespoon table salt
1 tablespoon granulated sugar
1 1/2 teaspoons paprika, plus extra to sprinkle on top of roasted chicken
6-8 chicken breasts (or other pieces of chicken)
freshly ground black pepper
olive oil
sea salt

Directions:
In a medium-sized bowl, whisk buttermilk, minced garlic, salt, sugar, paprika, and pepper.

Place chicken breasts in ziplock-style bag and pour buttermilk mixture into bag.  Massage bag to ensure buttermilk is surrounding all of the chicken, then remove air and seal.  Refrigerate at least two hours, and preferably 24 to 48 hours.  For chicken breasts in particular, longer is better.

Preheat oven to 425 degrees when ready to roast.

Line a small baking dish with aluminum foil.  Place chicken breasts in foil-lined dish, letting the buttermilk mixture drip off before arranging the chicken in the dish.  Drizzle olive oil over the chicken then sprinkle with additional paprika and sea salt.

Roast the chicken breasts for 20 to 30 minutes.  This, as always, depends on the size of the chicken, the size of the baking dish and nearness of the pieces of chicken, and, of course, the temperament of your oven.  If you are making chicken legs or thighs, this is a delicious browned look.  For chicken breasts, you want them cooked through; if you wait until they brown they will lose their tenderness.

Serve immediately.

Artichokes:
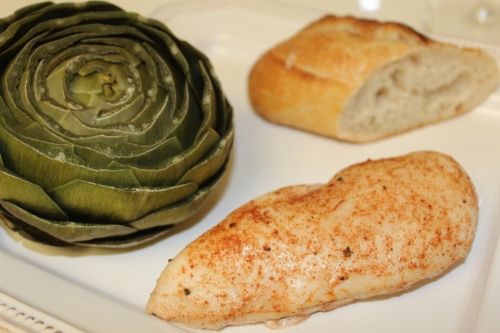
If you are looking for a good side dish that isn’t monochromatic, I would recommend (at least in springtime) artichokes.  Rinse them, cut off most of the stem and trim the leaves.

Fill a saucepan with one inch or less of water and bring it to a boil.  Place the artichokes upside down in the boiling water, cover and reduce to a simmer.  Simmer/steam for approximately 20 minutes, until the outer leaves pull off easily.  (Don’t test this too much — each leaf you remove is a leaf you don’t get to eat!)

Remove the artichokes from the saucepan with tongs and place on a cutting board.  Let cool for a few minutes, then slice off the remainder of the stem and place right side up on plates.  Serve with your preferred dipping sauce; my two suggestions are melted butter or worcestershire sauce and mayonnaise.  (It sounds disgusting but melds well with the vegetable).

Notes:
Like the garlic in last week’s gazpacho, the garlic in this week’s buttermilk marinade can be sliced and mashed or can be sufficiently demolished in a food processor.  My kitchen acquired a new garlic press, but I’m fearful its lifespan will be significantly less than the last one.

The chicken is fairly welcoming to most side dishes.  My favorites so far have been the artichokes mentioned above, warm crusty bread, and fresh fruit (kiwi today) for dessert.

Best of all, this can be turned into multiple meals by only removing the amount of chicken from the buttermilk mixture that you will be cooking in a night and letting the rest soak it up for another day.